Tuesday, January 8th, 2013
Bowtie Re-Construction
Recently for a Secret Santa event here at work I was given a bowtie. Sadly, it was a pre-tied bowtie, and I just won’t wear one of those.
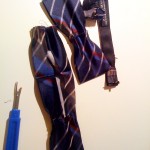
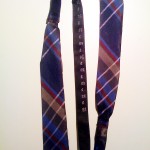
I decided to see if I could rip apart the bowtie and use the existing material to create a proper self-tie bowtie. There ended up being enough room for my 15.5 neck size, but I could have probably gone as high a 17 necksize. The pictures reveal that there is not enough material in the actual bow to make a butterfly shaped bow, so I had to create a straight bow. This is not my ideal shape, but I was happy to have this instead of nothing.
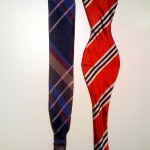
Anyway, here’s a very basic step-by-step process. The red one is my Brooks Brothers bowtie used for reference and the blue tartan one is the one I am re-constructing:
1) Use a seam ripper to cut apart the pre-tied bowtie.
2) Iron and steam out the creases of the bow.
3) Flip the fabric inside out and sew shut two of the three open edges, leaving a small side un-sewn.
4) Unfold the bow so the correct material is now outward facing.
5) Iron and steam this shape flat.
6) Fold the open end of the bow into the thin band that goes around your neck. This will take some fiddling and re-ironing.
7) Sew the bows to each end of the band.
8) Wear with pride!